Lead Enrichment with Zapier and Salesforce [Tutorial]
July 29, 2021
Table Of Contents
In this tutorial, you'll learn how to build our first workflow on Zapier and use it to enrich leads for Salesforce using the new People Data Labs (PDL) Zapier Integration.
What is Zapier?
Zapier is a workflow automation tool that easily allows you to send data between 2 or more apps, all without writing a single line of code! Zaps are another term for these automated workflows, and is how Zapier refers to them. At its core, workflow automation can be simplified to a series of WHEN and DO commands.
For example, a workflow you might have is, whenever someone subscribes to your email list, you add them to your CRM. Here the workflow command is:
WHEN:
New email list subscriber
DO:
Add new lead information to CRM
Zapier and People Data Labs
Zapier supports thousands of apps, including our new People Data Labs Integration! This means that you can now include Person Enrichment and Company Enrichment directly into your workflows.
For instance, we could update our previous workflow example as:
WHEN:
New email list subscriber
DO:
Person Enrichment using sign up information
DO:
Add person information to CRM
What is Person and Company Enrichment?
Enrichment means using some known information about a person or company to find more information about that same person or company. For any person or company that you want to enrich, you have access to any and every field in our Person Schema and Company Schema through our Person Enrichment and Company Enrichment API’s. For example, if you have a person’s name and email address, you could use the name and email address with our Person Enrichment API to find out their linkedin profile, their current job title and anything else available in our Person Schema. Similarly for a company, you could take the company website and use that to find the name, location, size, associated profiles and anything else present in our Company Schema. Person and Company Enrichment is a powerful way to dramatically increase the amount of information you have on a particular person or company.
Setting Up a Zap with Person Enrichment
Now let’s actually build out that example we just described! We are going to:
Take new subscribers from our MailChimp email list
Enrich subscriber sign up information using the PDL Person Enrichment Zapier Integration
Add a new lead to Salesforce using the enriched subscriber information
Zapier is going to be the piping that allows this information to be sent between these apps. At the end of this process, we’ll have an automated workflow that looks like this:
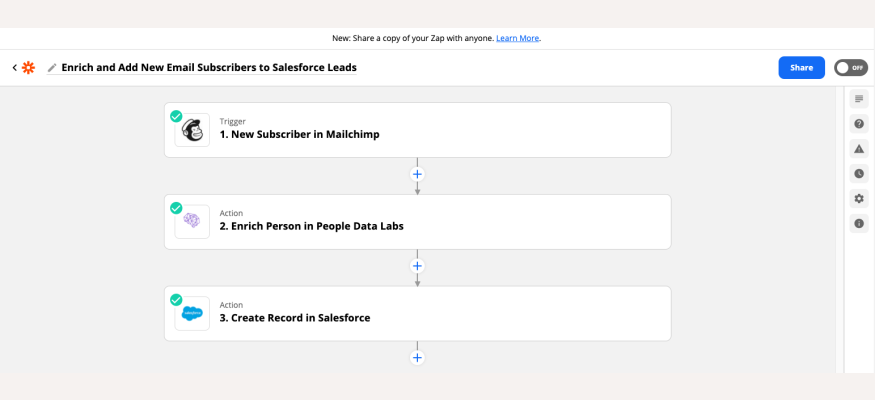
Overview of the automated workflow we’ll be building in Zapier
While MailChimp and Salesforce may or may not be the exact tools you use in your current workflow, the remarkable thing about Zapier is that once you know how to set up a simple automated workflow it is incredibly easy to integrate or swap out any other app you want!
Prerequisites
Before we get started here’s what you’re going to need:
People Data Labs API Key
Accounts with Zapier, MailChimp and Salesforce
Note: Salesforce is a premium Zapier app, so you will need an upgraded account in order to use Salesforce in your automated workflows.
Getting your Free People Data Labs API Key:
You will need a PDL API Key in order to use the PDL Zapier app, and signing up is easy! We offer a self-service dashboard where you can create a PDL account as well as sign up for subscriptions to our various API’s. We offer free trials for our Person and Company Enrichment API’s. So here’s what you need to do to get your API key:
Create a free PDL account at https://www.peopledatalabs.com/signup (checkout our Self-Signup API Quickstart guide for more information if you need).
Once your account has been activated, make sure you sign up for a free Person Enrichment and Company Enrichment subscription (no credit card needed)
Copy down your API key (a single API key is used for all your subscriptions)
Step 1: Create a Zap
A zap is Zapier’s term for an automated workflow. To create a new zap, simply login to your account at Zapier.com and click the Create Zap button.

Creating a new zap
This will take you to the zap editor, which is the interface where we’ll be designing our automated workflow.
Let’s start by naming our zap. Click the Name your zap field in the top left corner and type in “Enrich and Add New Email Subscribers to Salesforce Leads” (or whatever else you want to call your zap).

Naming your zap
Step 2: Choose an App and Setup your Trigger
With Zapier, trigger is an event from an app that kicks off the rest of your workflow. Not every app supports trigger events, but we can search for apps using the search box provided. Let’s search for “mailchimp” and use it to create a trigger:
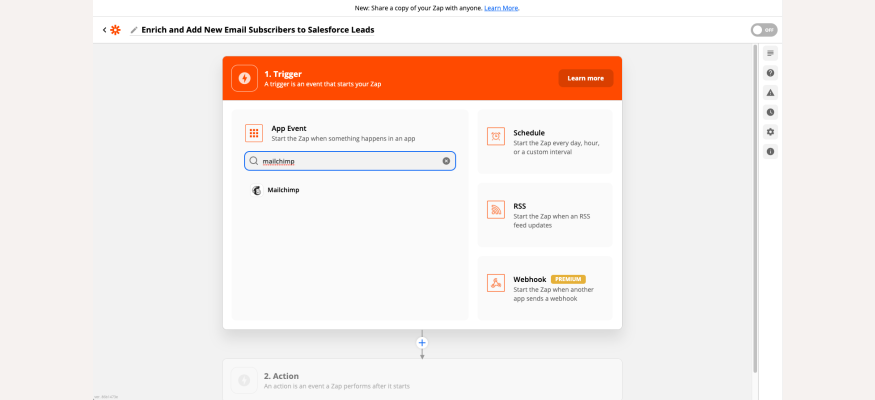
Searching for “mailchimp” for our trigger app
Clicking on the mailchimp icon will select it as the trigger app.
Next, we’ll need to select the event we want to trigger on. In our case, this is the New Subscriber event, which can be selected from the Trigger Event dropdown menu. Select it and then hit Continue.
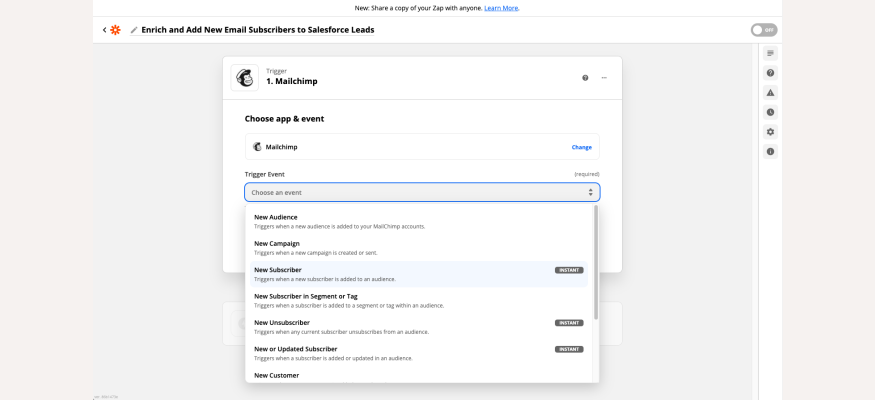
Select “New Subscriber” as our trigger event.
Next, you’ll need to connect your MailChimp account, which you can do by signing into MailChimp. Go ahead and sign in to add your account. Once you’ve successfully added your account, click Continue.
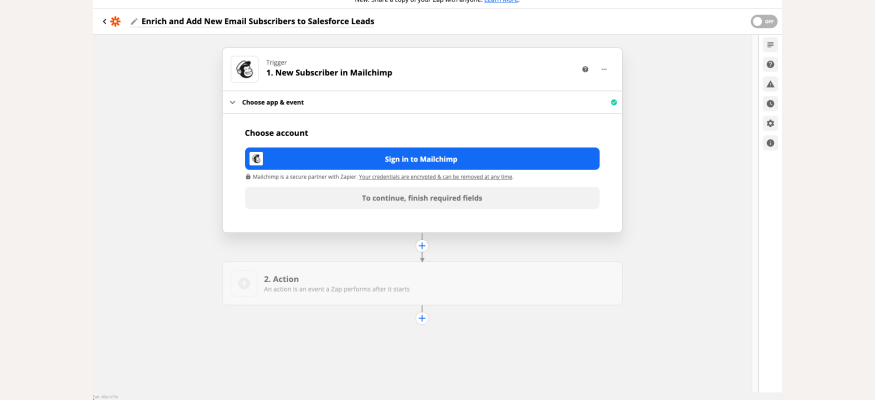
Sign in to connect your MailChimp account to Zapier.
Now, we’ll need to configure our New Subscriber trigger event, by picking an audience from your MailChimp account. The great thing about Zapier app integrations is that you can view your available audiences directly from the dropdown menu. In my case, I have an audience I created in MailChimp called Example Audience which shows up right in the dropdown inside the zap editor.
Note: If your audiences are not showing up you can hit the “Refresh fields” button inside the zap editor to try reloading the data from MailChimp.
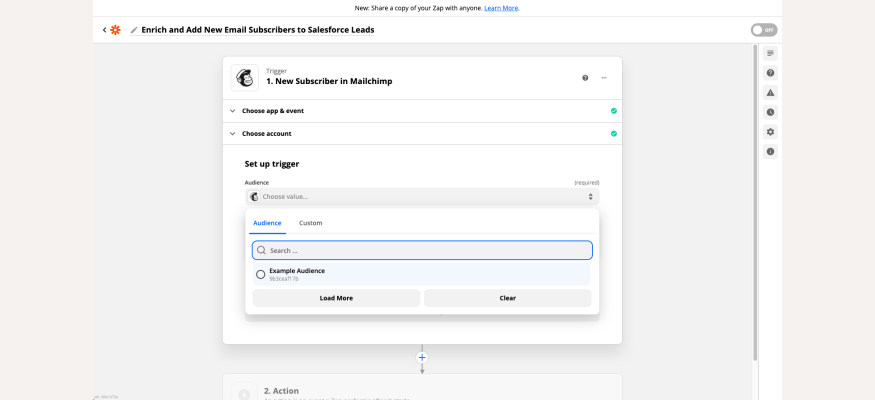
View and select your MailChimp audience directly from the zap editor.
Select the audience you want to collect new subscribers from and then hit Continue. Finally, before completing our trigger setup, we can test out our configuration to confirm that Zapier is able to correctly pull new subscribers from our MailChimp audience. Click the Test Trigger button to test out the configuration.
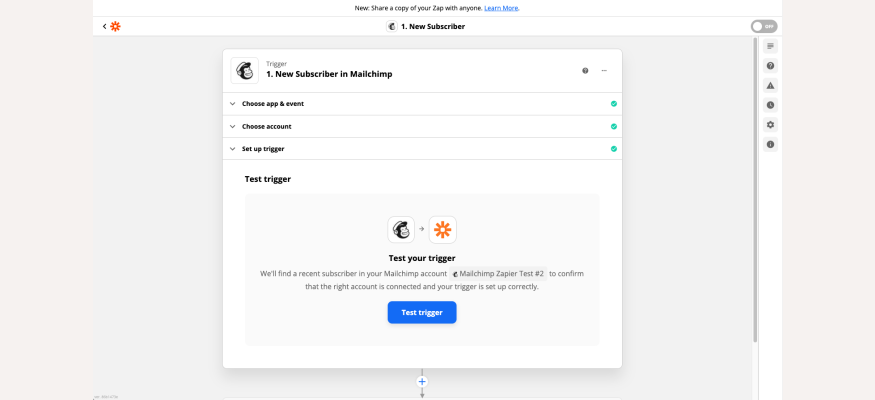
You can test out the trigger configuration to confirm the setup is correct.
If everything is correctly set up, you should see information from a current subscriber displayed in the response box.
Note: you will need to have at least 1 existing subscriber in your selected MailChimp audience for the test to work.
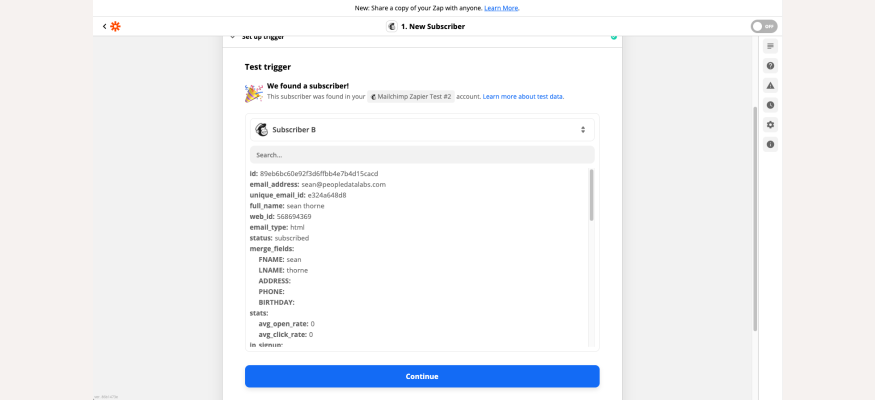
A successful test result - we can correctly see information on one of our subscribers from our MailChimp audience (PDL’s wonderful CEO Sean Thorne).
Finally, hit Continue to complete the setup for our trigger.
Step 3: Create an Action using the People Data Labs App
An action is some process that runs as part of our automated workflow. The first action we want to run after the new subscriber trigger is a Person Enrichment. Doing an enrichment here allows us to take the sign up information from our new subscriber and recover all the available information for the best matching profile in PDL’s Person Dataset. This enrichment information will then be available to use in all subsequent steps of our workflow (i.e. when we want to create a new lead in Salesforce).
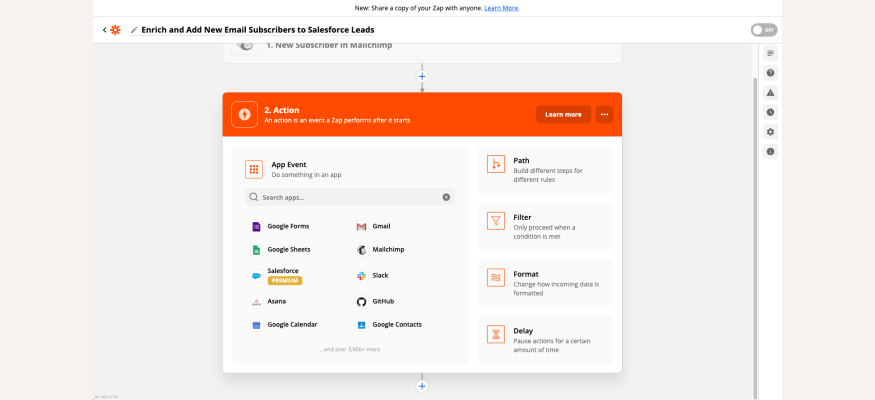
Creating a new action following our trigger event
To set up the Person Enrichment action, we’ll first add the People Data Labs app as our action. Just like we did to add MailChimp previously, type “people data labs” into the search box and click the People Data Labs app to add it as our app for this action.
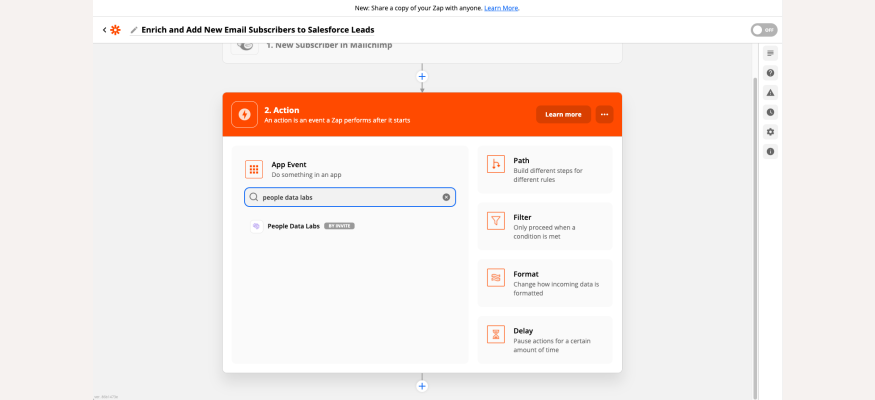
Add the PDL app for this action by searching for “people data labs”
Next, select the Enrich Person action event from the dropdown menu to specify using the Person Enrichment API for this action. Then, hit Continue.
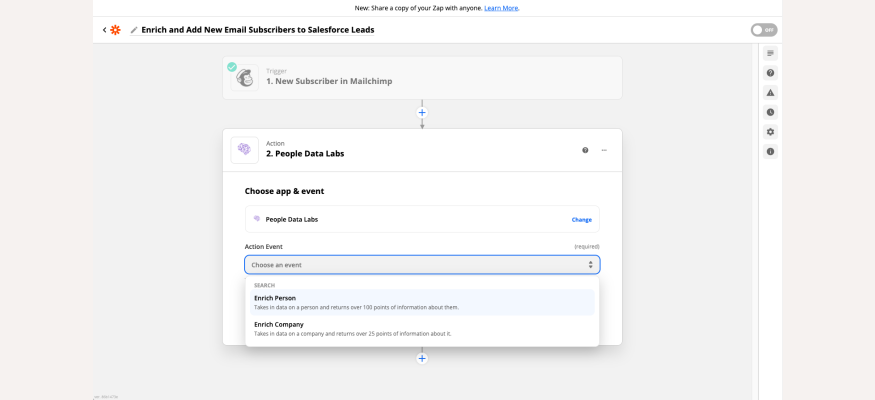
Select the “Enrich Person” action event from the PDL app
Now, we can connect our PDL account to Zapier simply by providing our API key. Click the Sign in to People Data Labs button and enter in your PDL API key to connect your account. Then, click Continue.
Note: If you haven’t already signed up for a PDL account you can sign up for free at https://www.peopledatalabs.com/signup. Once your account has been created you will be able to view your API key. You will need to have an active subscription to our Person and Company Enrichment API’s in order to use our Zapier integration (but we offer free trials!).
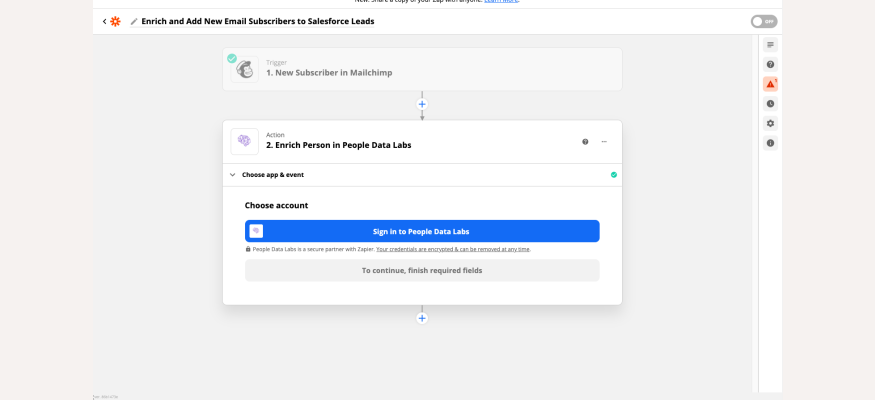
Connect your PDL account by clicking the sign in button and providing your API key
This next step is relatively important in order to ensure that we get the right results from the Person Enrichment process.
Here, we’ll have to configure the action by specifying the inputs to the Person Enrichment API.
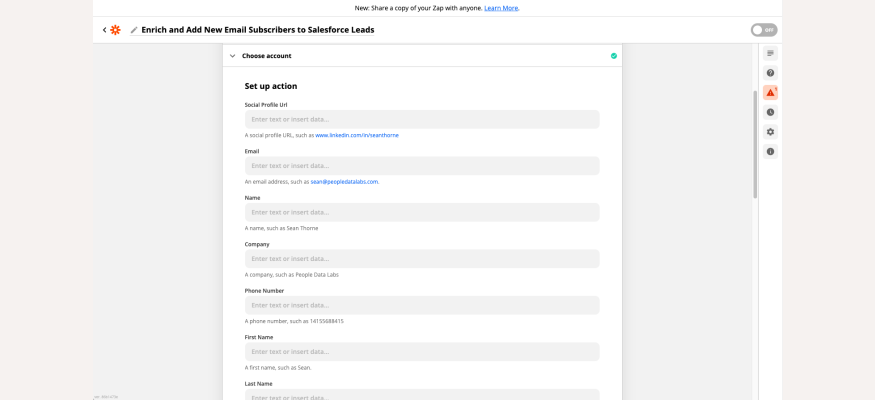
Configure the action by specifying the inputs to the Person Enrichment process
Some background: the Person and Company Enrichment API’s are relatively flexible with the inputs that they accept, however they do have a minimum set of inputs that are required to successfully perform the enrichment.
For Person Enrichment, you must provide at least:
A social network profile, an email, a phone number, a hashed email address or a Linkedin ID
OR
A name (either full name or first + last name) AND a locality, region, company, school, location, or postal_code
The reason for this is to ensure that the Person Enrichment process has a high enough chance of successfully finding a unique profile match in our full person dataset. Any additional fields provided beyond the minimum required set will further improve the chances of a successful enrichment. For more information, please see our documentation: Person Enrichment API - Input Parameters.
In our workflow here, we will fill out as many fields as possible using the information available from our New Subscriber Trigger event. To fill out a field, click the input area. This will bring up a menu containing all the available data from any previous events in the workflow (currently, just the New Subscriber Trigger event). You can then click to select the desired event data or search for specific event data using the search box in the popup menu.
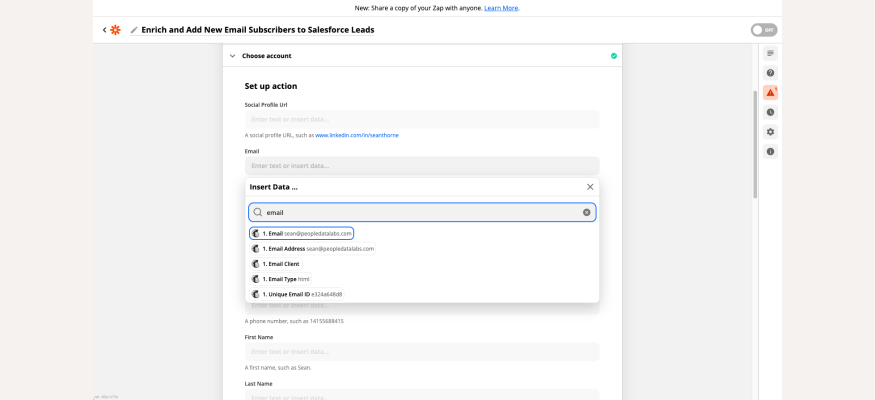
Filling in the input fields using data from previous events in the Zapier workflow
From our New Subscriber Trigger event, the data we’ll have access to is the new subscriber’s name and email as well as potentially phone number, address, and birthday information (this depends on what information we require from new subscribers when they sign up for our email list). We can use this information to fill in the following input fields for the Person Enrichment action:
Email
Full name
First name
Last name
Birthday
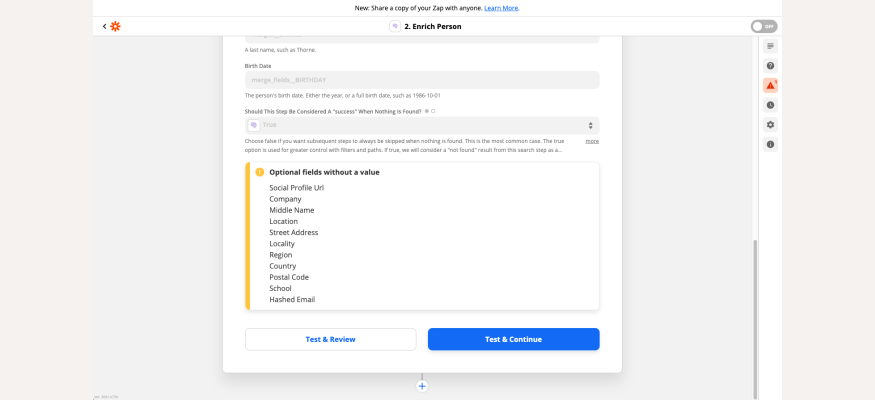
The last field we’ll want to fill out is the field labeled Should This Step Be Considered A “success” When Nothing Is Found?. This field controls whether to continue onto the next steps in the workflow if the enrichment step fails and no additional data can be found in the PDL Dataset. By default, this field is set to False, meaning that if no enrichment data is found, then the workflow will finish without running any of the subsequent steps. In our case, however, the following step will be to store the new Subscriber as a lead in Salesforce, which is something we would want to do regardless of whether or not enrichment data was found. Therefore, we should set this field to True so that the lead still gets added.
Set this field to True and then hit Continue.
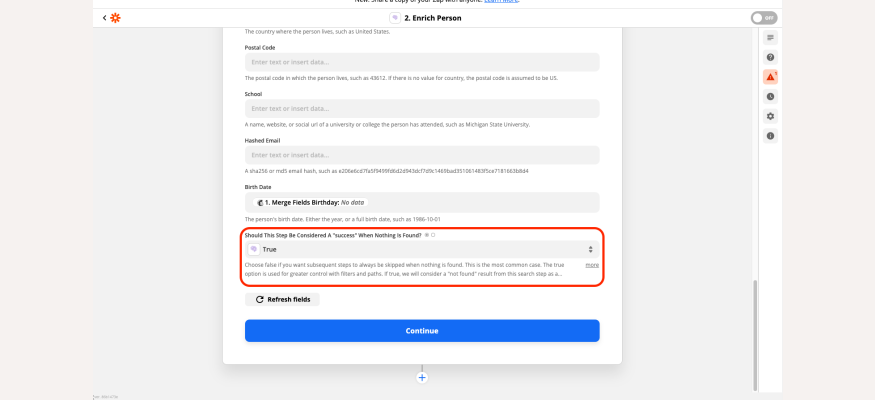
Set the field value to True to allow the rest of the workflow to continue even if the enrichment is unsuccessful
Finally, just like we did previously, we can test our action to see whether we have successfully configured the Person Enrichment step in our workflow. Click the Test & Review button to test the Person Enrichment step using the sample new subscriber information from our earlier trigger test.
Testing the Person Enrichment step
If the test is successful, you should see the full enrichment information displayed in the response box.
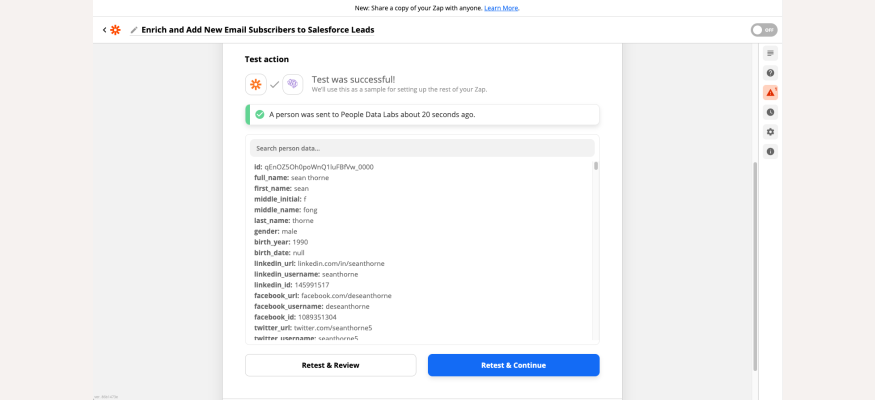
Successful test result for the Person Enrichment step
Hit the Close button to complete the configuration of this step.
Step 4: Create an Action using Salesforce App
Finally, we can create the last step in our workflow by creating an action to store the new subscriber information along with any enrichment data as a new lead in Salesforce.
To create another action, click the “+” button after the Enrich Person in People Data Labs action.

Add a new action to our workflow
Just like we did with the People Data Labs app, we will search for Salesforce and select it as our app for this action.
Note: there are different versions of the Salesforce app available on Zapier. In our case, we will be using the full version of the Salesforce app (i.e. not Essentials and not Legacy). This is a premium Zapier integration, so you will need an upgraded Zapier account to be able to use this Salesforce integration in your workflow.
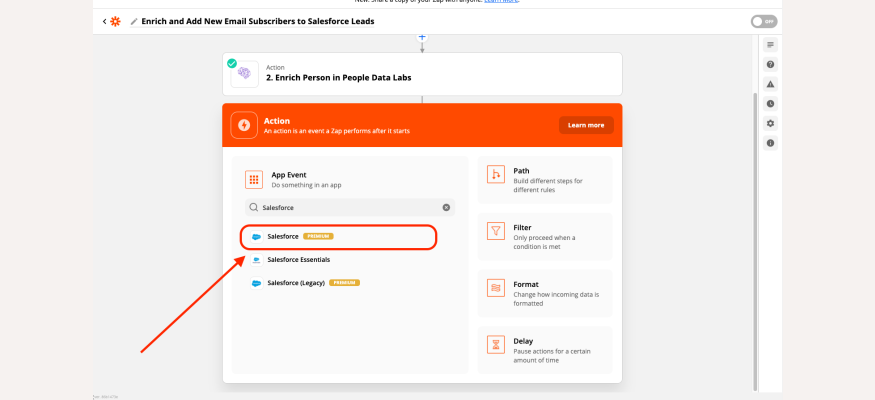
Select the Salesforce app for this action
Next, we’ll choose an action event for this step, which in our case will be Create Record. This will create a new record in our Salesforce account each time this action step is performed. Select Create Record and then hit Continue.
Note: Selecting Create Record as our action event assumes that any new record being created does not already exist in your Salesforce account.
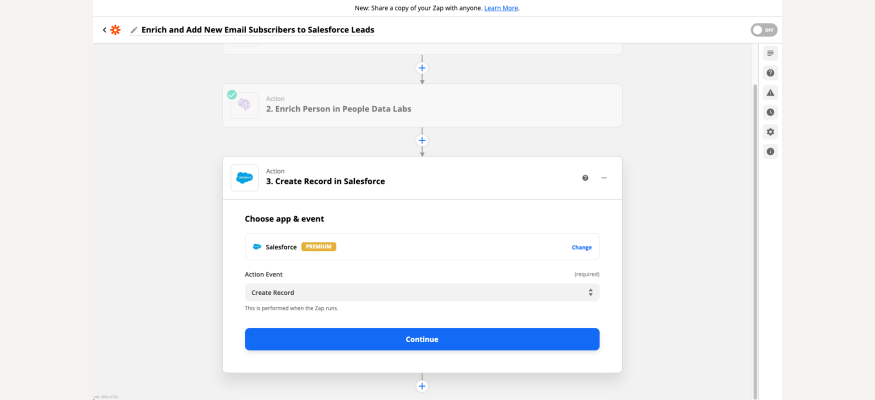
Set the action event to Create Record
Now, click the Sign in to Salesforce button to login and connect your account to Zapier.
Note: When signing in you will be prompted to select either a production or sandbox Salesforce environment. Unless you have specifically set up a sandbox environment for your Salesforce account, you should select “production” and then continue through the login form.
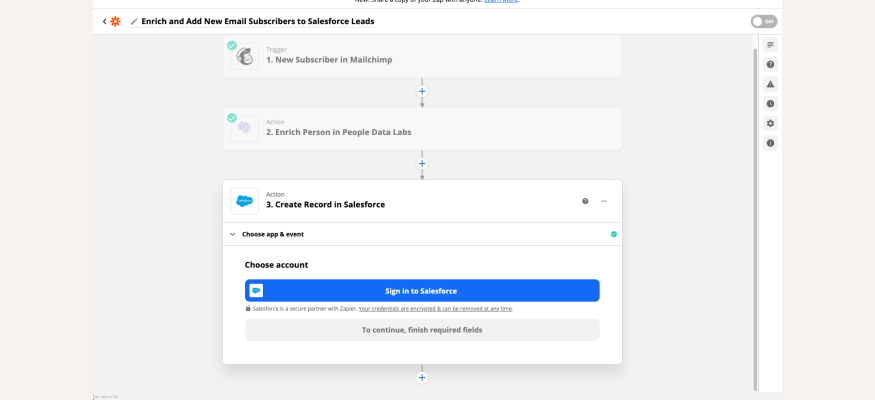
Sign in to connect your Salesforce account
Once you have successfully logged in and connected your Salesforce account, hit Continue. Next, configure the action by setting up the Salesforce object you would like to create. In our case we are interested in creating new leads, so select Lead from the dropdown.
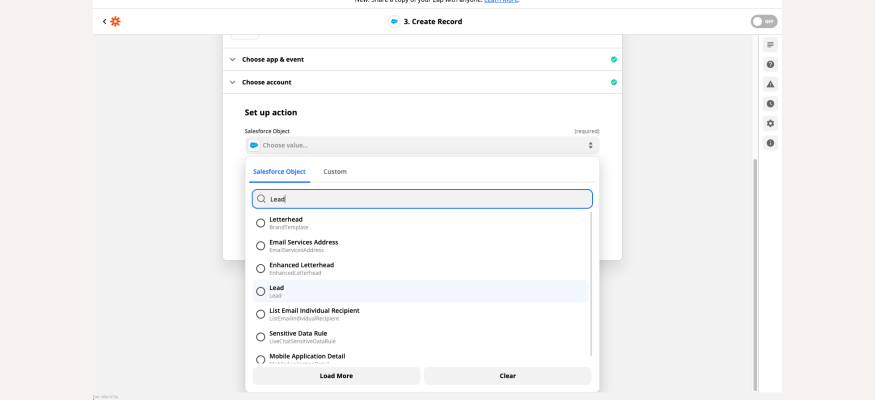
Configure the action to create a new Lead object in Salesforce
After selecting Lead, the form will refresh with all the fields you can use to create your new lead. We want to fill in as many of these fields as possible since this is the information that will be stored for our lead in Salesforce. This step is where the value of the Person Enrichment step comes into play - we can use the enrichment information to augment our new lead in Salesforce.
Just like before, we can fill in the fields by clicking on the input area and selecting the appropriate data from any of our previous events. We still have access to all the event data from the new Subscriber trigger event, but in addition we now have data from the Person Enrichment event as well - which gives us access to the hundreds of data fields available in the PDL Person Schema. Because of the large amount of data that is available, we recommend using the search functionality when filling the fields in this step.
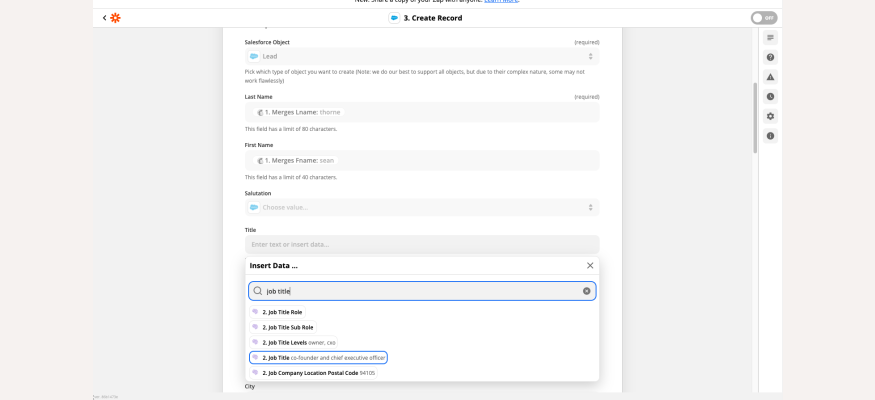
Filling in fields using the search functionality
You can fill in the remaining fields with whatever information you would like, though here is one suggestion:
Last Name → Merges Lname (MailChimp)
First Name → Merges Fname (MailChimp)
Title → Job Title (PDL)
Company → Job Company Name (PDL)
Street → Job Company Location Street Address + Job Company Location Address Line 2 (PDL)
City → Job Company Location Locality (PDL)
State/Province → Job Company Location Region (PDL)
Zip/Postal Code → Job Company Location Postal Code (PDL)
Country → Job Company Location Country (PDL)
Phone → Merges Phone (MailChimp)
Mobile Phone → Mobile Phone (PDL)
Email → Work Email (PDL)
Website → Job Company Website (PDL)
Description → Last Note Note (MailChimp)
Once you have finished filling in the fields, hit Continue. Finally, we can test this action by clicking Test & Review.
Note: This will attempt to create a new Lead in your Salesforce account. If an identical lead already exists, this test will fail.
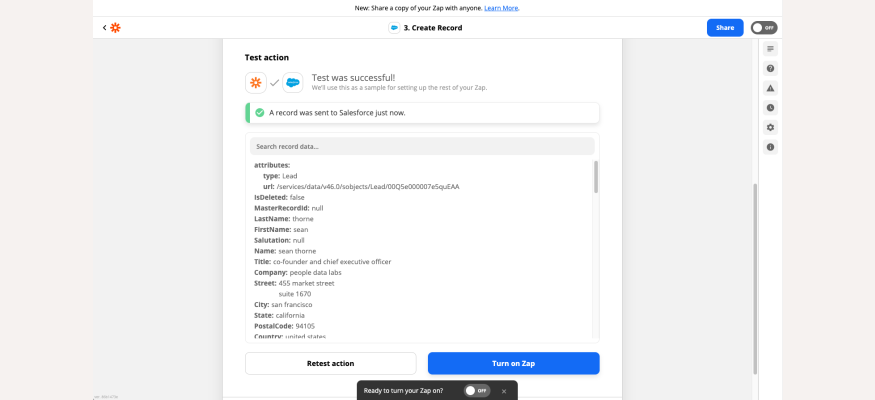
Successful test of the Create New Lead in the Salesforce action
If the test is successful, you should be able to go into your Salesforce account and view the newly created lead. If the test fails, then double check that the lead does not already currently exist in your Salesforce account or double check your permissions.

A new lead was successfully created in Salesforce
Once you are happy with the test result, you can click the Turn on Zap button to activate your zap and complete this automated workflow!
Closing Thoughts
Zapier is an incredible automation tool that allows you to easily design workflows across thousands of interconnected apps in minutes. The People Data Labs app allows you to easily augment your leads with data directly from our massive person and company datasets, all without writing a single line of code! In our example, we used the Person Enrichment action to tie some simple signup information to phone, email, job and company information which we then used to create a new lead in Salesforce.
We encourage you to try integrating Person and Company Enrichment into your other workflows, and we’d love to hear your feedback. If you are more technically inclined, we also provide direct API’s for the Person and Company Enrichment services as well as a host of other products and services which you can view through your self-serve dashboard after creating a PDL account. If you have any questions or suggestions or are interested in more credits and higher rate limits, please get in touch with one of our data consultants today!
Like what you read? Scroll down and subscribe to our newsletter to receive monthly updates with our latest content.